Slide Tutorial - Part 1
The slide creation option is not difficult to master and offers more flexibility than the simpler multiple choice and matching methods for test creation. Using the set of available tools, you can draw geometric shapes, plot graphs, and create identification quizzes. This tutorial will show you how.
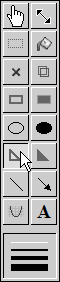 There are two types of tools on the TOOLBAR at left. The first six buttons (move, resize, select, paint, delete, clone) are used to manipulate objects which already exist on your slide. The remaining buttons are used to draw new objects on the slide. The lines at the bottom are for selecting the line width of your objects.
To get started click on the Triangle tool as shown.
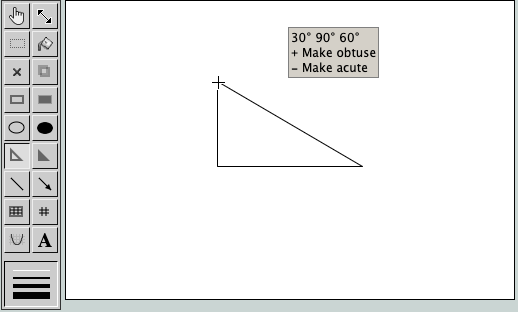 Draw a triangle by clicking near the bottom right of the slide and dragging up to the left. A panel appears to show you the angles of your triangle. While dragging the triangle, use the + and – keys to make the triangle obtuse or acute.
Draw a triangle now. Experiment by dragging in different directions and pressing the + and – keys while dragging. Hint: Press control while beginning the triangle for an equilateral triangle, or shift for isosceles.
Hint : Practice drawing many triangles. Undo your work with the Undo button. Finish with a single right triangle as shown in the tutorial picture.
 To create multiple choice answers, look for the Answer Options box located immediately above the slide on the left side. Click and drag the box onto the slide.
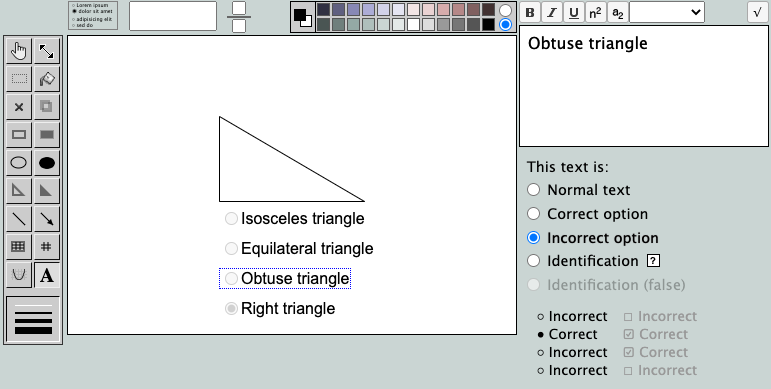
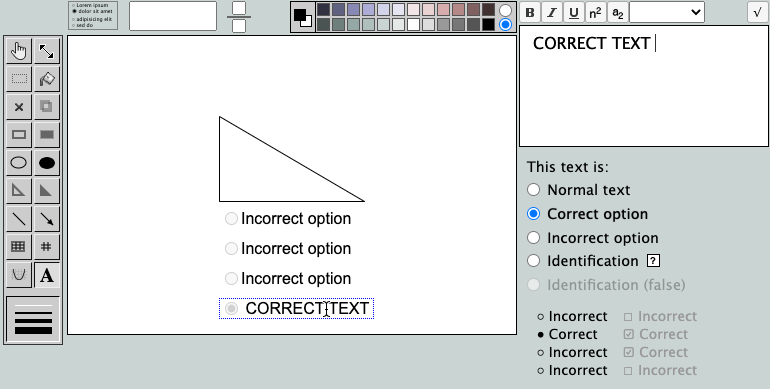 Click on the text tool (A) in the toolbar. Move the cursor over the correct answer option so that it is outlined in blue. Whenever an object is outlined in blue that means it is ready to be edited. Click on the CORRECT TEXT option and use the Text Box on the right side of the screen to edit the text.
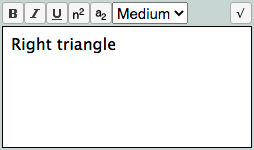 In place of CORRECT TEXT type "Right Triangle". The Text Box is used for editing all text in the slide. The buttons change the style of selected text. The select box changes the overall size.
 Whatever text you type in the box appears simultaneously on the main slide.
Edit the remaining incorrect options. Add options like isosceles Triangle, Equilateral Triangle and Obtuse Triangle which do not properly describe the drawn figure.
With the same text tool, this time click on an empty area of the slide to write the question. Write "What kind of triangle is this?" or some similar question so that the correct answer will correspond to the triangle you have drawn.
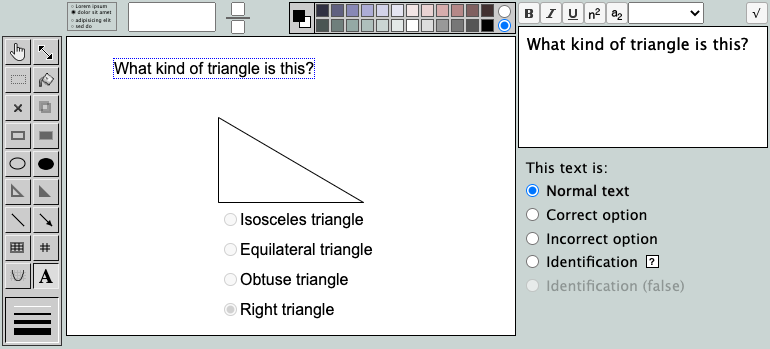 Notice that under the Text Box there are five categories of text: Normal text, Correct option, Incorrect option, Identification, and Identification (false). On this slide we have text belonging to three of the categories. You can always change the category of text you're editing in the box. For instance, you can change which options are correct and incorrect. We don't need Identification text in this slide because it is a multiple choice question, but we'll use identifications later in the tutorial.
 Click the Next button to advance to slide number two. You can move forward and backwards between slides by using the Next and Back buttons.
You've finished the first part and are ready for the second part of this tutorial.